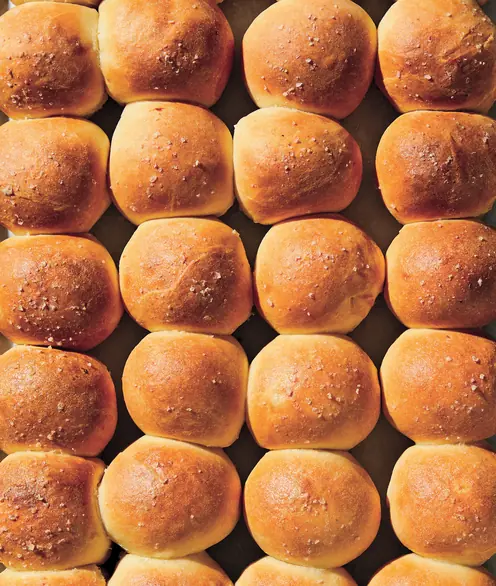

This recipe is inspired by and adapted from Dan Lepard’s muffin recipe in one of my favourite baking books, "The Handmade Loaf." Being sourdough muffins, they have great depth of flavour and will last well for several days.
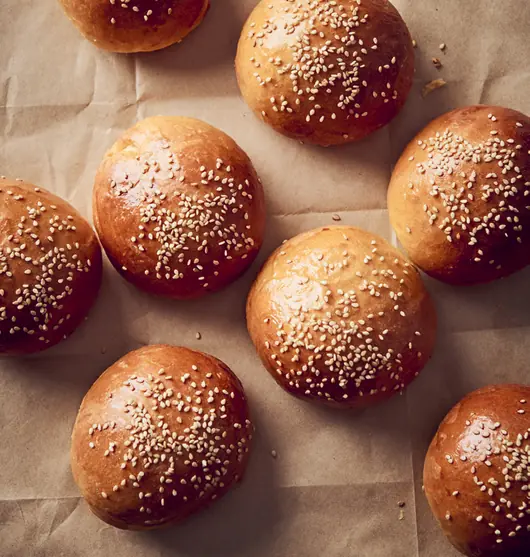
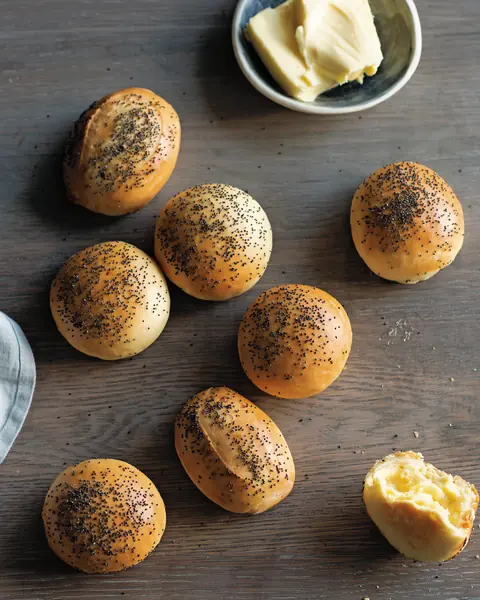
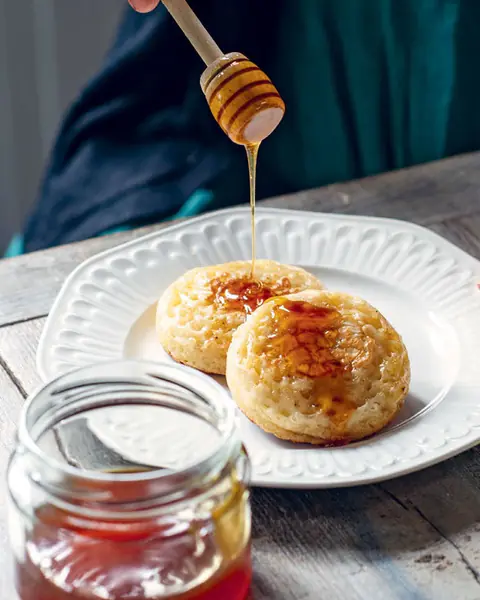
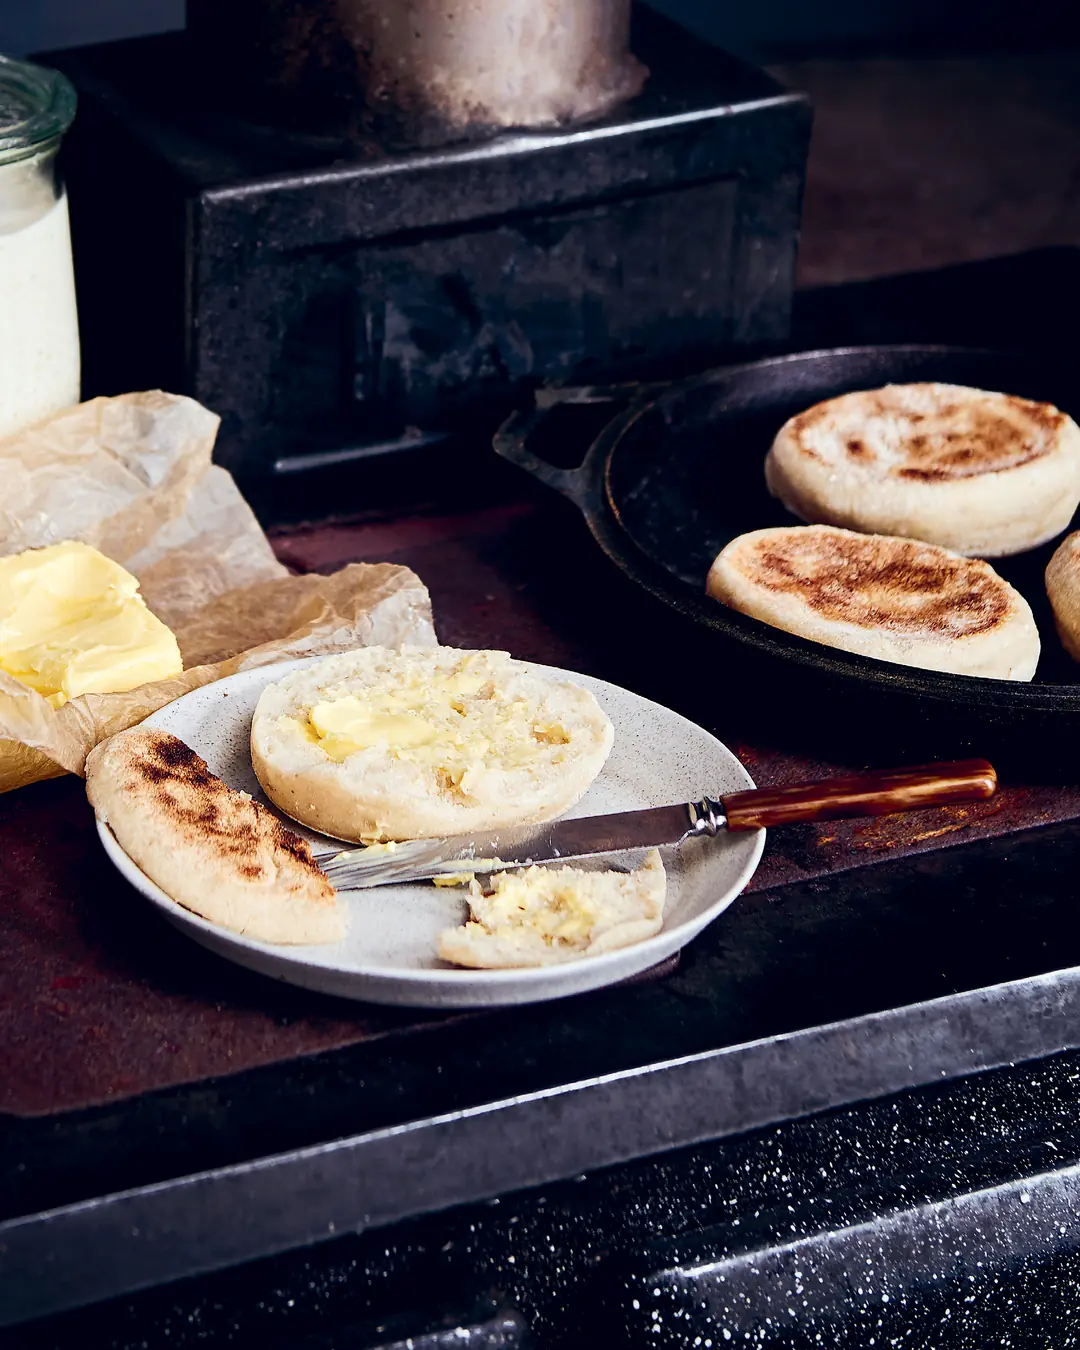
English muffins are an excellent vessel for all things brunch. A well-made muffin has lots of holes to perfectly capture the runny egg and hollandaise from your Benedict – yum. The dough is cooked on both sides in a hot pan, then sliced in half and toasted. I love the flavour and texture the buckwheat brings to this version – earthy, warming, and perfect with just a smear of cultured butter on top.
Makes 8.
Ingredients 8
Your new home
for cooking
Turn your recipe chaos into a plan for the week.
Browse 1000+ inspiring creator recipes
Unlimited recipe import from social media, blogs and more
Generate shopping lists and meal plans in seconds with AI
Method 15
Preheat the oven to 160°C (320°F). Spread the onto a baking tray and toast in the oven for 20 minutes, or until they’re a light tan colour.
Cool completely, then lightly crush them using a mortar and pestle or with a rolling pin. Transfer to a small bowl and add the . Set aside to soften for 10 minutes, then drain.
Combine the softened , , , , , and in a large bowl. Mix well with your hands, gently massaging the ingredients together to remove any lumps. The dough should be quite sticky.
Pour in the melted , then use your hands to work the butter into the dough until it becomes one mass. If you find it easier, tip the dough onto a lightly floured kitchen bench and knead it for a few minutes.
Cover the bowl with a damp tea towel (dish towel) and rest for 30 minutes.
The dough is now ready to be folded. Give the dough a set of folds every 30 minutes for the first 2 hours. To fold, wet your hands, then use one hand to hold the bowl and the other to fold. Grab a piece of dough on the side of the bowl, then pull and stretch it up and over the middle to the other side of the bowl. Repeat this six to eight times, moving around the edge of the bowl. Cover and rest the dough between each set of folds.
After the last set of folds, cover and rest the dough in a warm place for 3 hours. Ideally the temperature should be around 22–24°C (72–75°F). If the room is too cold, put the dough in your (cold) oven with the light on, with a tray of hot water at the bottom to create warmth and humidity.
The dough is ready when you see that it is gassy and bubbly with air pockets – it should wobble a little if you gently shake the bowl. You should be able to stretch the dough between your fingers.
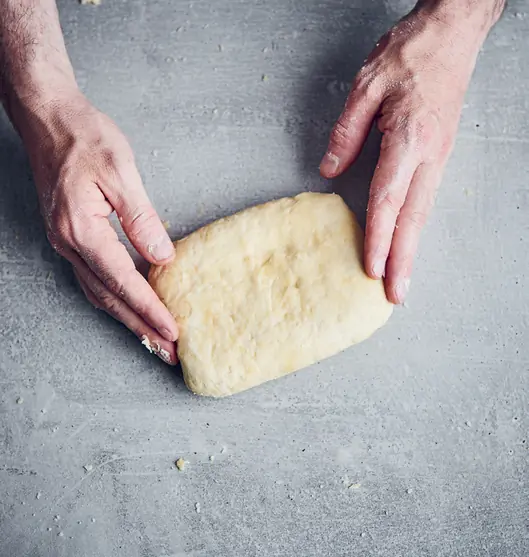
Gently tip the dough onto a lightly floured kitchen bench. Use a sieve to lightly and evenly dust the top of the dough as well. Ease the dough gently with your fingers into a rectangle roughly measuring 20 × 28 cm (8 × 11 in) and 3 cm (1 1/4 in) thick. You want to minimise any air loss in the dough, so work with a light touch.
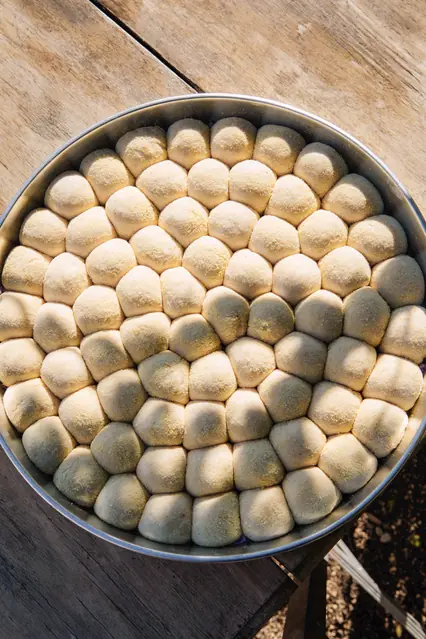
Cut out six circles using an 8 cm (3 1/4 in) round cutter. Gather all the trimmings together, fold the dough over itself and then gently flatten and cut out two more circles. These last two muffins will be slightly denser than the others because you will have knocked some air out, but they’ll be just as tasty. Or, to save time, cut the dough into six or eight rectangles.
If you want to cook your muffins the next day, cover with a damp tea towel and place in the fridge. When you are ready to bake, let them come up to room temperature and finish proving as below.
To prove your muffins, leave them in a warm place covered with a damp tea towel, or again put them in the oven to prove. The proving time is variable and depends on the temperature of the room: if it’s cool, let them prove longer; if it’s warm, you will be able to bake sooner. As a guide, it should take 1½–2 hours if the temperature is around 22–24°C (72–75°F). They will rise by half and will wobble slightly if you shake the tray. Test the dough by gently pressing the surface. If your fingertip leaves a dent, they’re ready to bake, but if the dough springs back quickly, cover them again and give them more time.
To cook the muffins, heat your cast-iron pan over a medium heat for 20 minutes so you have good radiant heat. Using a dough scraper or spatula, gently place two or three muffins at a time in the hot pan, leaving space between them, as they will spread and rise in the pan. (You might like to do a test-run first with just one muffin, to check the heat of the pan and how long it takes to cook. Once cool, open it up to see if it’s fully cooked inside, then make a note of the cooking time.)
Cook with the lid on over a medium–low heat for 8–10 minutes on each side. You are looking for an even golden crust, so check the first batch after a few minutes to make sure it’s not browning too quickly. If it cooks too quickly, it will be too dark on the outside and the crumb will be underbaked and doughy; if it cooks too slowly, it will dry out.
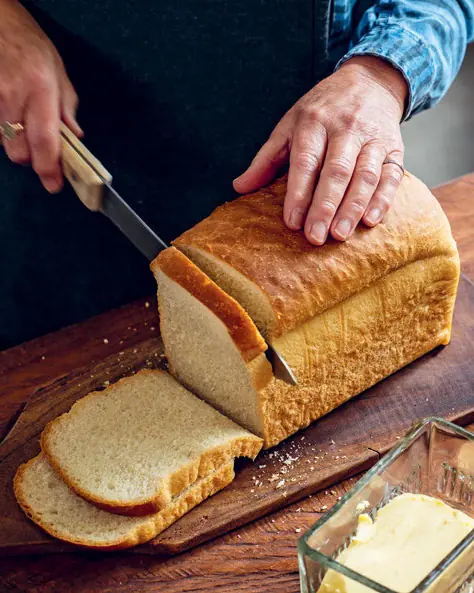
Repeat for the rest of the muffins, transferring them to a wire rack to cool. The muffins keep well for a few days fresh, or can be frozen, then cut in half and toasted as needed.

Urbanstead's tips
I use my Lodge pan to cook the muffins. It’s a heavy cast-iron pan with a fitted lid, ideal for this recipe. A large heavy-based frying pan with a lid will also work, but you may need to cook the muffins for longer, as the pan won’t retain as much heat as a cast-iron one.