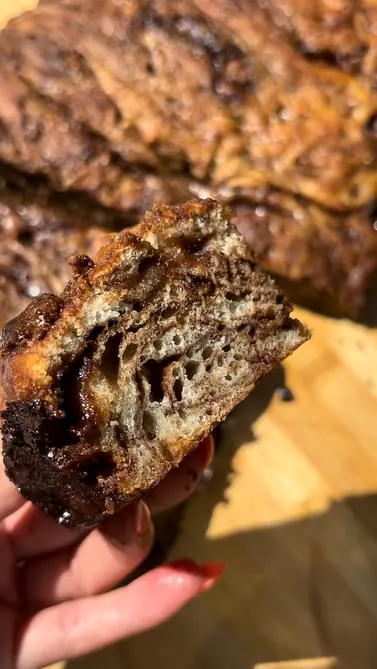

What’s better than a buttery brioche loaf? One laced with swirls of rich, gooey gianduia!
This indulgent babka marries soft, pillowy dough with chocolate hazelnut spread in every bite — you just have to trust me, it's a showstopper.
The best part? The brioche dough needs to be made 12-24 hours in advance, so you can have most of the work already done the day before and serve a warm babka on the day of with little fuss. It's totally worth the wait.
Ingredients 11
Brioche Dough Ingredients
Filling Ingredients
Sugar Syrup Ingredients
Your new home
for cooking
Turn your recipe chaos into a plan for the week.
Browse 1000+ inspiring creator recipes
Unlimited recipe import from social media, blogs and more
Generate shopping lists and meal plans in seconds with AI
Method 21
Day 1
Make the brioche dough by adding the , , and to the bowl of a stand mixer along with all the dry ingredients (, , , and ). Mix at medium speed using the dough hook attachment for 3-4 minutes.
Stop the mixer and fold the over itself a few times using a spatula. Make sure to scrape any dough stuck to the sides of the bowl and incorporate it too.
Continue mixing the for several minutes until it pulls away from the sides of the bowl.
With the mixer still running, add the room temperature one teaspoon at a time and continue mixing until it is fully incorporated. The dough should be shiny, feel a little elastic, and have come completely away from the sides of your mixing bowl.
Use a spatula to gently transfer your into a lightly greased container with a lid and refrigerate overnight to encourage a long, slow fermentation.
Day 2
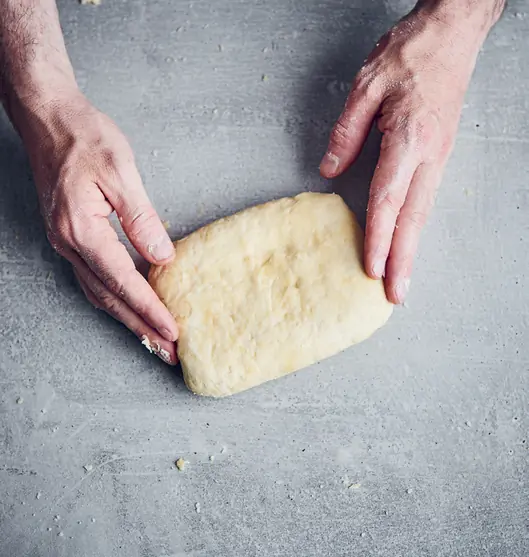
Sprinkle some over your work surface and carefully tip the dough out from the container (without folding or kneading it). The dough should be firm to the touch as the has solidified in the fridge.
Dust some over the top of the dough and press down with your hands to start to flatten it. Slowly start to roll the dough using a rolling pin with even pressure, only moving in a straight direction back and forth (so that you maintain a square shape).
Turn the 90 degrees, dusting with a little more if needed, and roll a few more times. Repeat until you have rolled the dough out to a 30 cm x 30 cm square (11.8 in x 11.8 in).
Using an offset spatula (or butter knife), spread the evenly over the top of the , leaving a roughly 2 cm border around the edges.
Starting from the bottom and working your way up, begin to roll the bit by bit until you create a large log.
Pinch the end of the roll to the rest of the so it sticks and roll it over. Transfer the log onto a floured tray and place it in the fridge for 20 minutes.
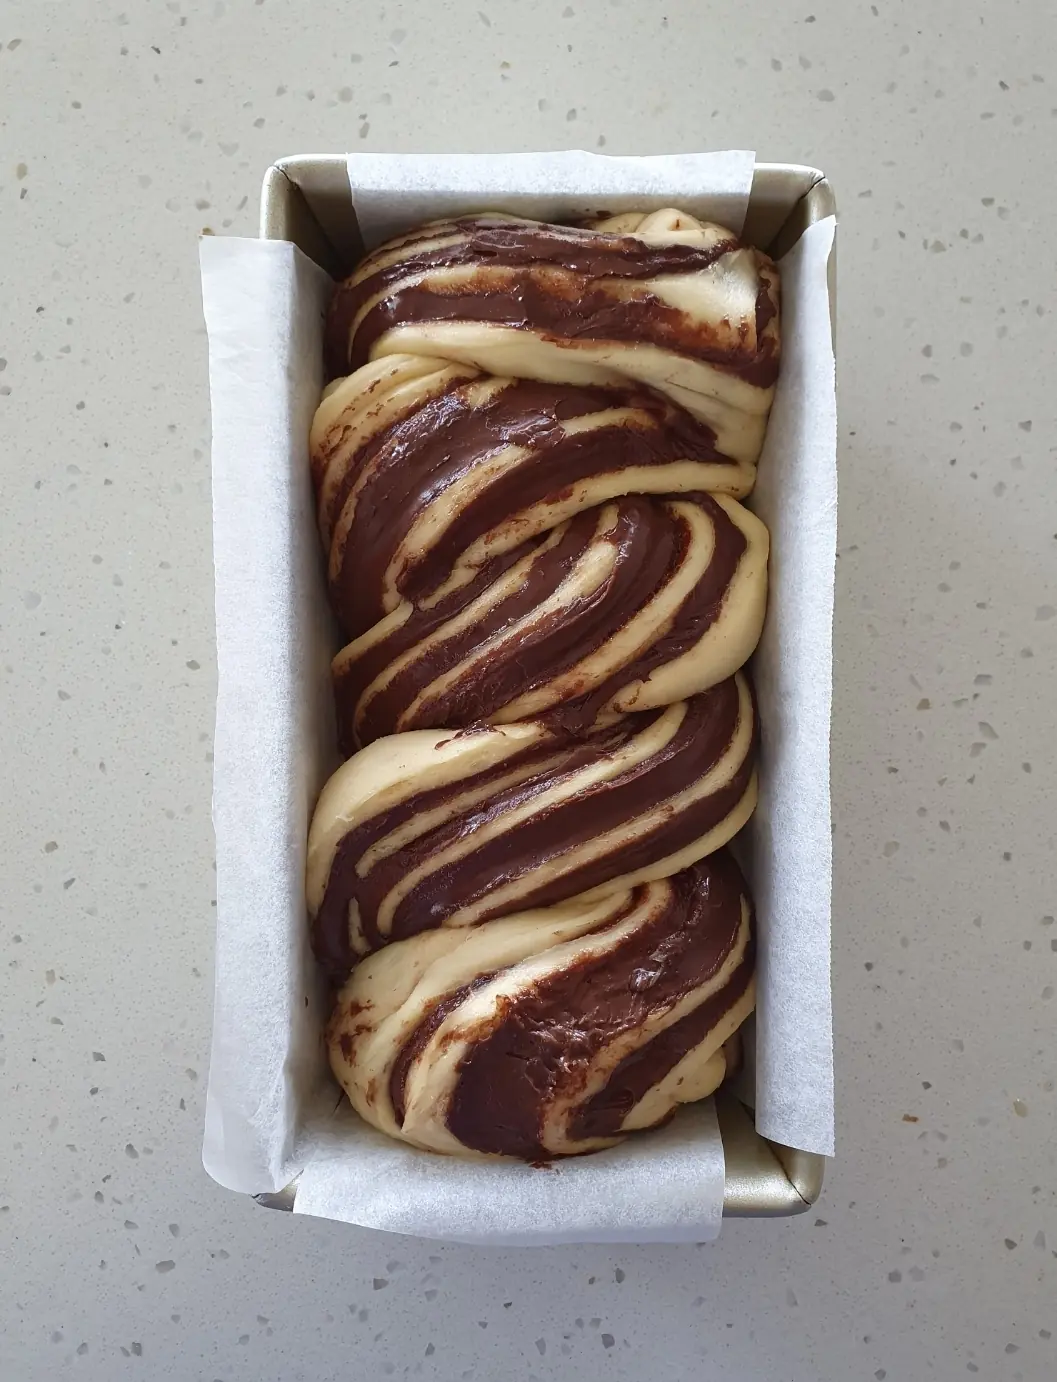
Place the log onto a lightly floured work surface. Using a serrated bread knife, gently cut directly down the middle (along the whole length of the ), separating it into two halves.
Place the halves filling side up, crossing them over each other to create an X.
Twist one side over the other, always making sure the side is facing up (for better presentation). Continue twisting until the two completely meet and pinch each end so it comes together well.
Cut two pieces of baking paper so you can layer them each way across a . The baking paper should come slightly above the sides of the tin, as this will help you lift the chocolate babka out once cooked.
Place the into the tin, ensuring it is pressed in well. Tightly cover the tin completely with plastic wrap and allow it to proof for 1 hour. Before the babka is proofed, preheat the oven to 170°C (338°F) fan-forced.
Remove the plastic wrap and cover with foil. Bake covered for 20 minutes.
Remove the foil and bake for a further 10 minutes uncovered to brown the crust.
While the babka is baking, stir together the and for the syrup in a small saucepan and bring it to the boil. Once it has boiled, simmer for a further 5 minutes until it becomes syrupy, then turn off the stove and leave it to cool.
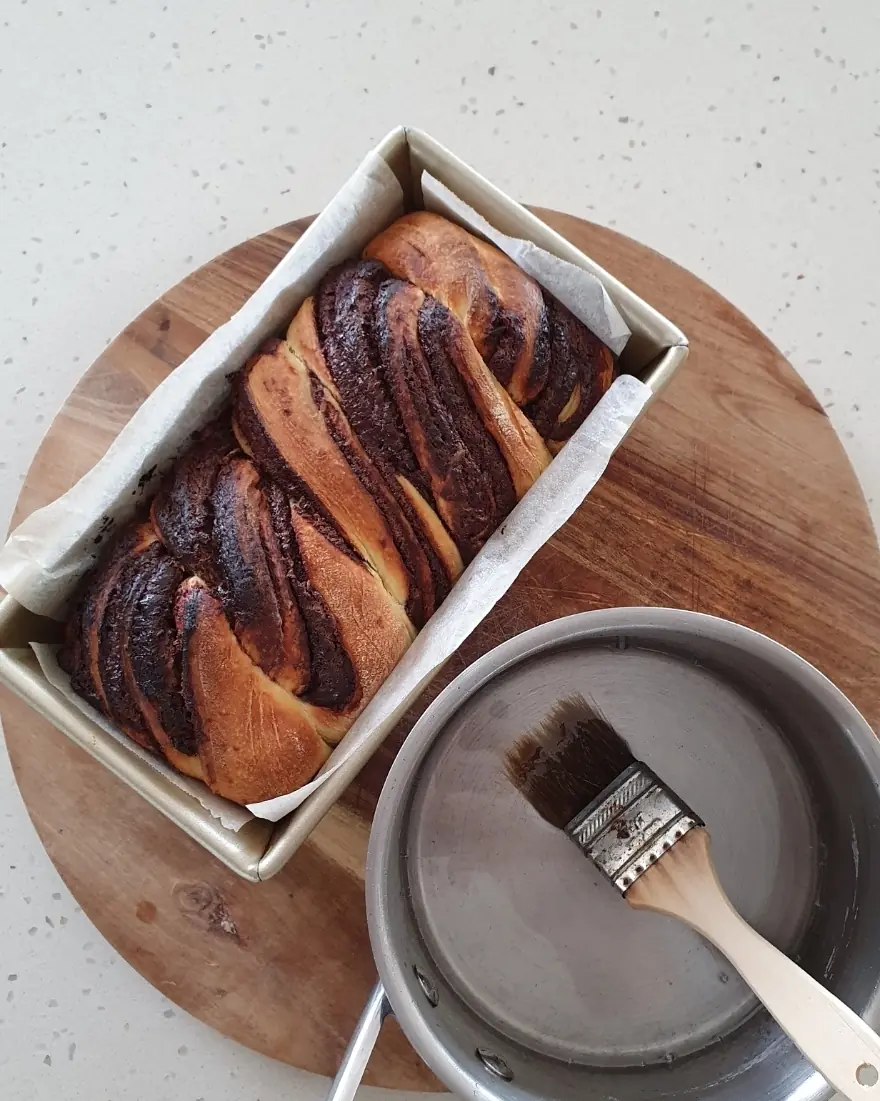
Brush the over the top of the babka while it is still hot and leave to rest for 10 minutes in the tin.
Now pull the out of the tin using the baking paper to lift it up and place it onto a serving board. Allow it to cool for 1 hour before slicing.

Anthony Silvio's tips
Good quality ingredients make all the difference. My favourite gianduia can be difficult to find: Nonna Maddalena Hazelnut Spread. It's made with a whopping 56% Piedmont hazelnuts, not too much sugar, cocoa and olive oil.
The longer the dough stays out of the fridge, the softer and more difficult it will become to work with, particularly on a warm summer day. Be gentle and work swiftly! Brioche is quite a delicate dough.
If you're not a gianduia enthusiast, you can opt for other creamy fillings like crema di pistacchio! Or get creative.